
Moparts Tech Archive
Brake System
rear disc brake install with pics
feetsMoparts Stock
Reged: 01/20/03
Posts: 179
Loc: Irving, TX
rear disc brake install with pics
The hot rod needed a new anchor. I don't trust the 38 year old four wheel 10" drum brakes. Added insecurity comes from the master cylinder loosing pressure. It's time to modernize.
I have the full 11.75" front disc setup waiting to go on and I thought 11" rear discs would compliment them nicely, so I picked up the TSM kit for $259. It came with everything shown here:
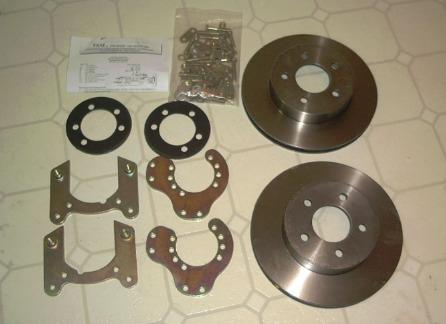
What I like about this kit is that all of the wear items can be sourced locally. The calipers and pads are standard GM pieces but the rotors are lightly modified 83 Lincoln Continental pieces. The modification is nothing more than opening up the center register hole to fit the flange in the center of Chrysler axles.
I grabbed a set of used rear calipers from an '83 Eldorado to use as cores. That's MUCH cheaper than paying the $80 core charge per caliper at the parts house.
I mocked up the kit today. On the initial build, I left the axle out for ease of assembly. When I was satisfied with the position of everything, the kit was removed and rebuilt with the axle in place.
The car was properly supported on stands and the side of the axle I was working on was lifted just enough to prevent residual gear oil from dribbling out of the housing.
Obviously, the old brakes need to be removed. I opened the master cylinder and used a vacuum pump to suck the brake system dry from all four bleeders (don't forget I'm doing the fronts too). When the system was dry, I removed the brake lines and yanked the five nuts holding the axle and brake backing plate to the axle tube. Four of the five axle flange studs need to be knocked out and replaced with the longer studs provided in the kit.
After the flange was cleaned up, I slid the round spacer plate and base bracket in place. The round spacer takes up the space where the drum backing plates used to be.
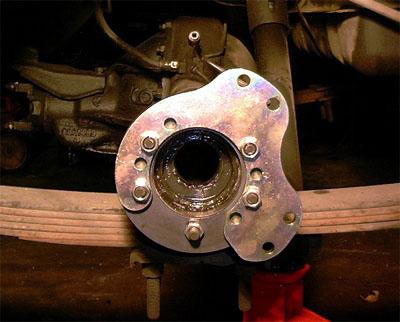
The base brackets can me flipped or moved around to place the caliper in any one of several positions. I chose the rear 90* position to provide clearance for my future rear sway bar.
With the base securely in place, the caliper bracket was installed behind the base bracket using the spacers provided in the kit.
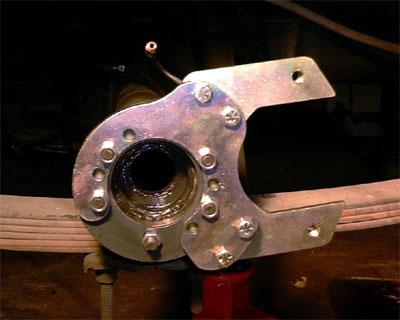
The brake caliper was slipped into the caliper bracket so I could see the position relative to the leaf spring and surrounding items. These calipers have a bleeder on the top and brake line on the bottom. It may be possible to reverse the positions of them to allow different positioning.
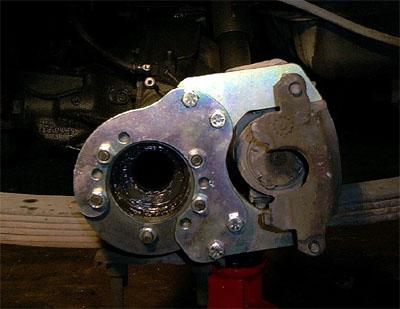
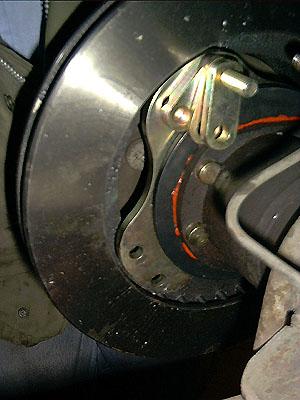
Everything checked out fine so I removed the setup and installed the axle. The parts were bolted on again and I slid the rotor on to check the clearance. Here you can see the gap between the rotors and brackets as well as some of the spacers hanging from the top bolt.
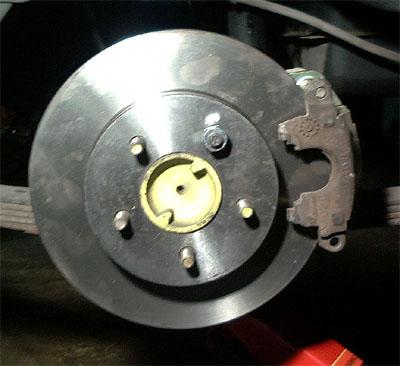
The rotor was then slid back off in order to install the spacers, caliper bracket, and caliper. Since this is a mock up with used calipers, the pads were not installed but there's ample room to slide 'em in.
One drawback I found to mounting the calipers in the 3 o'clock position instead of 45* higher is that the leaf spring is a little too close to slip the lower caliper bolt in place.
I'll either get a little creative and work around that problem or simply rotate the base bracket up one hole to allow everything to clear.
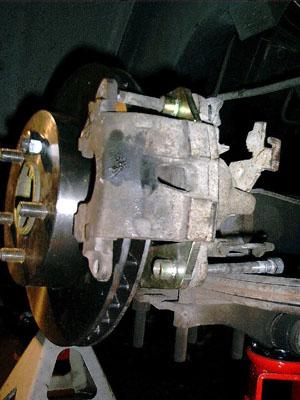
Now, I need to do something about those nasty calipers and install the rubber brake line. These calipers use a cable pull parking brake that operates the caliper instead of the more common drum style e-brake found in many rear disc brake systems. It looks to be an easy retrofit and I'll follow up with that when I get it done. You can see the e-brake lever poking out of the back side of the caliper in that last pic.
Everything I needed was supplied with the kit. The parts have a quality look and feel to them. Since I'm a tightwad, I opted to source my own calipers and brake lines. They are available through TSM.
I'd love to tell you how these things work, but I've still got to convert the front brakes, new k-frame, engine, tranny, etc, etc, etc....
Tech Index