
Moparts Tech Archive
Motor General
Need some Definition of terms pertaining to porting.
Before I get to grinding can you guys give me these definitions just so I know what the goal is.Knowing what these words mean and performing the task are two different things.
bowl work:
Blend bowl:
unshroud the valve:
releive valve guide:
Anything else? PICS WOULD BE SOOOOO COOL!!
thanks,
Rob
bowl work:
The bowl is the area directly under the head of the valve. It's, well, bowl shaped 
blend bowl:
Basically smooth out rough/ sharp edges and create a nice smooth transition from the bow to the port
unshroud the valve:
Usually done when larger valves are installed, the larger head comes close to the side wall of the combustion chamber, if it's too close it will inhibit flow, this is usually done on a miller not by hand
releive valve guide:
If you look down into the bowl you will notice that there is a large boss around the valve guide. This boss has nice sharp edges that if blended can help flow.
I asked all these questions before and got alot of help, most of it was to be very conservative, well I didn't listen and ruined my heads. DONT GO NUTS WITH THE CARBIDE BIT!!!!
Somebody gave me a link to an on-line article that was very helpful. Go to www.Moparmusclemag.com and look at the tech articles.
Also Standard Abrasives has a website with general info thats helpful.
------------------
got torque?
'73 Challenger
440, auto
Rob:
All my ported heads are currently bolted to something.
The bowl is everything you can see under the head of the valve.Does that make sense??? Remove the valve from the head and the area under where the valve was that you can see is the bowl.
Clean up any lip or sharp edges around the valve seat from where the seat was installed.
And try to roll those edges into the port(runner).
You'll want to see if you can straiten the bowl walls and get at least 85% of the valve size under the seat.
Blending is trying to make the transition from the runner to the bowl as smooth and contunious as possible.
Unshrouding the valve is the area around the head of the valve in the combustion chamber where the flow could be impeded by
restrictions created by the chamber design.
Reliieving the valve guide involves removing (lowering and blending) the valve guide in the bowl area.
If you've got an old head it's best to pratice first on something it don't matter first and get the feel of the tools you'll be using and the "tricks" needed to handle them.
Hopefully someone can do better then I can with better details then I've given here.
carl
------------------
10 sec smallblocks are fun
Okay, about the unshrouding... I've taken the valves out. And if I look straight into the valve opening I can see that there is material right behind the valve opening. So what I should do is try to make this opening behind the valve seat 85% of the opening, right. I'm guessing that leaving 15% would maintain the integrity of the seat?
Another thing... I'm using the 587 heads and it looks like the intake has more material than the exhaust. It doesn't look like the exhaust is gonna take much work.
What other than clean them up a bit, what should I do on the exhaust runners?
thanks,
Rob
Hey!
Do you have the Mopar Performance porting templates? Part # 4120437
Everything that I have read says that they are pretty much mandatory for a first time ported... nice & conservative, but good for some 18% better flow or something like that.
Hope this helps
Paul Cassar
www.mopar-stuff.com
Paul,
My understanding is that those templates won't work with my heads.. hence, all the questions.
Rob
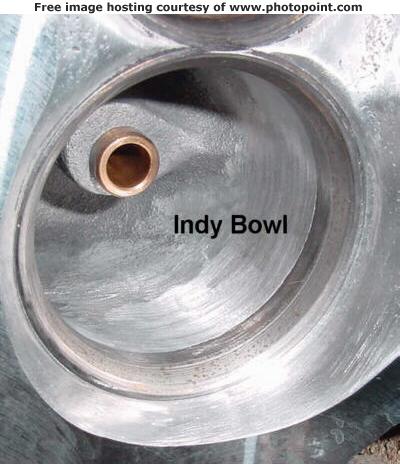
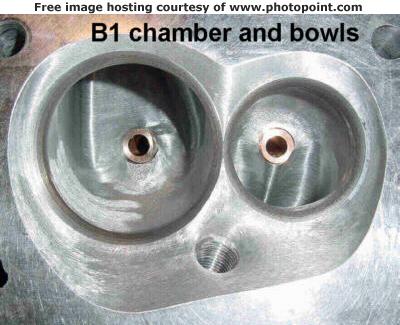
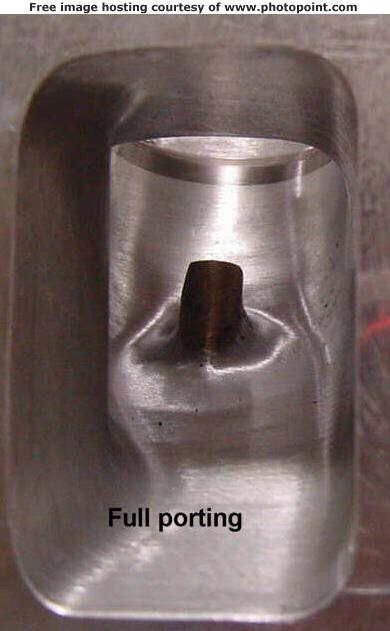
Here's some pic's, one unported head, one with mild porting, and one with all out porting. Unfortunatly I do not have any before and after pictures of the same head. May be able to get some of 906's later. I will try to add some comments later, got to get to work now.

Thanks Michael! That just about says it all.
In this case a picture is worth a thousand dollars...LOL.
Now my question is... why is there so much fear in cutting on the heads? In that last pic (full porting) they have cut the crap out of those ports and the bowl.!! Hell, they left the valve guide insert hangin in the wind! As long as one is conscious of the water, there shouldn't be a problem.
thanks again,
Rob
Mopart, That last picture (full port caption) is a B1 port that has quite thick port walls as cast for porting. You didn't say what kind of heads you're preparing to cut on, but the aftermarket heads in general have much thicker walls and are cast to a better net shape and size to begin with as compared to factory iron castings.
There are probably many reasons people are afraid to cut on heads, some are valid concerns such as ruining the flow by upsetting the proper port shape and size. In general I believe blending the abrupt ridges in the bowls is fairly straight forward, but on iron factory heads there is not a huge amount of meat to work with, but you should be safe if you blend the high ridges and do not enlarge the bowls otherwise. The proper shape, in other words where to cut and where not to cut is not always so obvious, especially when first beginning. When looking at the ports from the bowl and gasket face it can be hard to determine actually where the restrictions are, and the areas that need to be re-contoured in the port and chamber are going to be very hard to discern as well. Working with a flow bench and actual results are the only way to confirm the results. Some areas such as the short turn on the port floor and around the valve seat both below the valve in the bowl and also in the chamber are sensitive, and small changes can be critical to how much the flow is hurt or improved.
Making one part of the port too large or improperly shaped can cause turbulence where the flow will be unstable and actually cause a restriction caused by air swirling. I believe the original factory castings may be the hardest to port properly because the shapes are more compromised to begin with and curves are usually more pronounced and to really improve the flow some areas should actually be filled let alone not cutting away, and other areas need to be cut significantly. Of course there are many “stages” you can take a port to from minor clean up work to welding or epoxy work and major reconstruction of the ports.
Core shift can be a factor in how much the port can be enlarged, two heads with the same casting numbers can be significantly different and one head may have adequate wall thickness after porting and another may have holes or thin spots that will break or crack. There are visual clues for the experienced about core shift, but internal cooling passages are hard to judge without a sonic tester.
The main goal of porting is to allow good air flow for the size (cross section) of the port for good velocity and volumetric efficiency based upon displacement and desired horsepower and rpm range, and the other critical engine components must match as well to get optimum performance. As far as giving any exact advice about where to cut and not cut that is nearly impossible to do as particular casting require different work and even the same head will have ports the are inconsistent where one may need to be cut differently than the others to end up with the same net shape and flow.
Thanks for the advice, Michael. The more I look at the heads, the harder it is to tell what to do, so I understand whay you're saying.
I'm taking the heads to the engine shop Monday to have them cleaned and checked. If everything is okay, I'm going to have them cut the intake seat for the 2.02's.
Now, seeing that I'm going to have the heads cut to 65cc's (75 cc's now), should I do this before or after the porting? My guess would be that I do it now along with cutting the intake side too.
btw, these are 587 SB heads.
thanks,
Rob
---------------------------------------------
I guess I could have just looked this up. For those who have popped in and out of this thread to see what's going on, check this out.
http://www.sa-motorsports.com/diyport.htm
Rob
If you do all of the finish machine work (especially valve job) it leaves little room to clean up some nicks later, so depending on how confident you are about having some accidents with the die grinder, you'll have to decide.
As far a the combustion chambers go, depending on well you wish for certain areas to match the cylinder, the angled areas will change some in size depending on how much is milled from the deck. It's nice to rough in the valve seats when going to larger valves, then port, and do the finish valve job last. If you use a carbide cutter one little slip can make some nasty gouges where you don't want them, but even a stone or tootsie roll cartridge can mess up a valve seat.
High performance and race engines take a lot more steps and time to do "right" than basic builds, you'll just have to weigh the pros and cons for your situation.
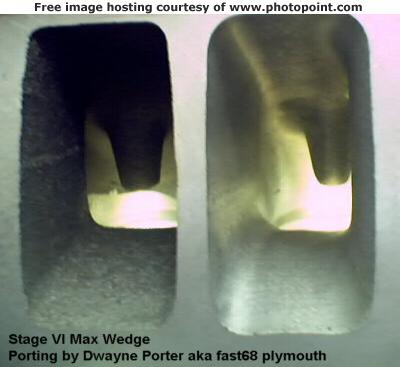
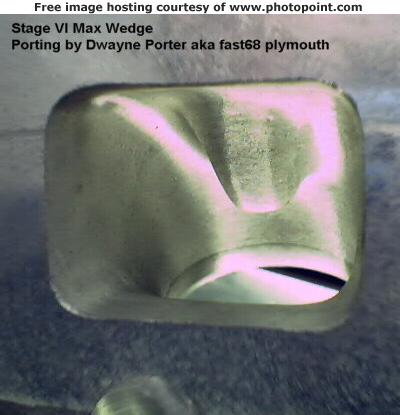
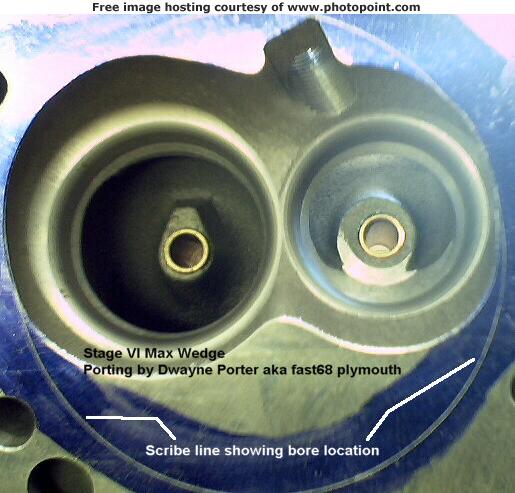
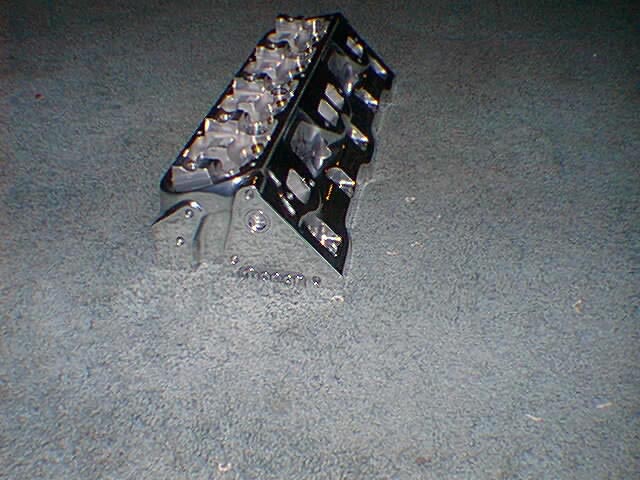
Heres some pics of the MP SB commando alum head.
These first couple of pics provided by 340six of his heads. Shows the chamber and exhaust port.
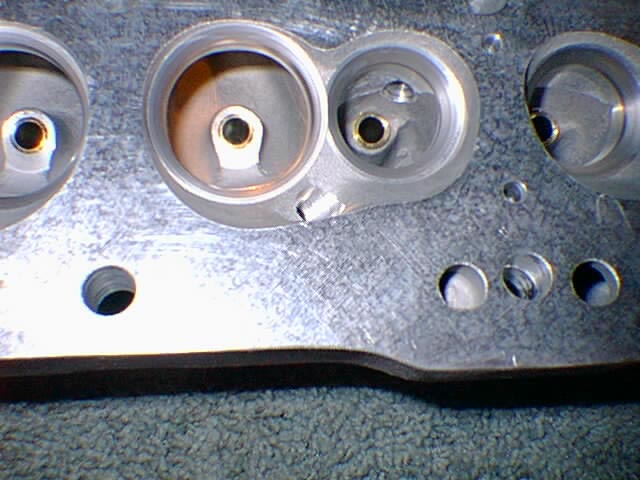
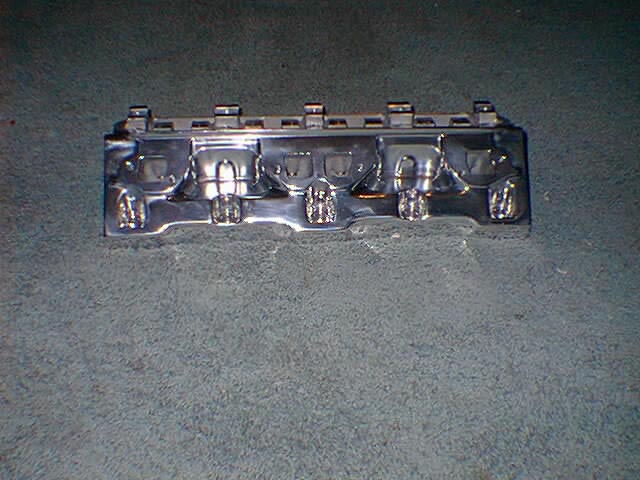
These pics from 340six is after he polished the heads.
=============================
Tech Index